
This is long, but I'm trying to be thorough. It was a bit of a process.
My table was a honey stained pine.
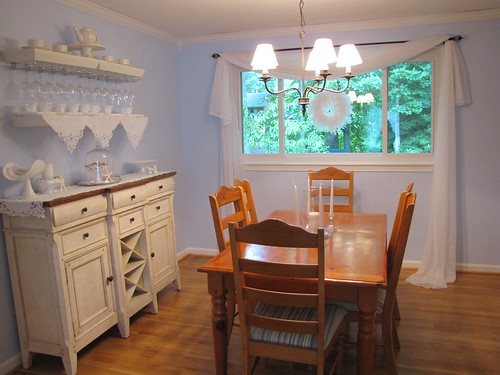
First, I concentrated on the chairs. I removed the seats by unscrewing them from beneath. I had previously recovered them by just stapling the striped fabric over what was there.

Then, I lightly sanded and spray painted them - 1 coat of spray primer, 2 coats of ivory spray paint. I suppose you could just use regular paint, but I wanted to save a little time.
IMPORTANT: If you use spray paint, wear a mask!! Its a lot of spray paint for this amount of furniture and it didn't take me long to realize that I REALLY needed a mask.
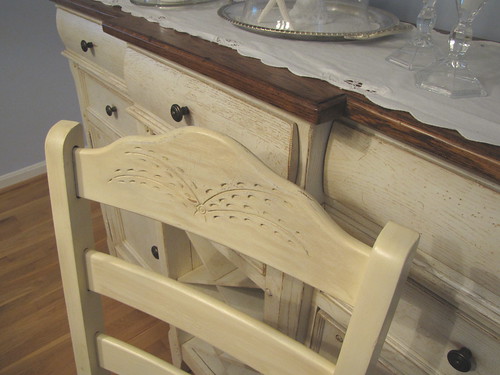
Once it was dry, I used a rag to apply some stain rubbing it on and playing with texture to match my sideboard. The finish was a little dark so once the stain dried, I distressed it with sandpaper. Everyone has their preference, but I liked gel stain for this because it dries much slower so you have more time to play with the finish. I found that traditional stain dried too fast for me here. I used the same method above with the legs of the table. I didn't bother covering the top of the table because I knew I was sanding it down to bare wood so it didn't matter if I got a little paint on the top.
Once I finished with the legs of the table, I moved on to the top which was the most work by far. I purchased an orbital sander (Rigid 5in. Orbit Sander) which made the stripping so much easier. I have a few pieces of furniture that I wanted to refinish, so the sander was worth it. I think it took me an hour at most to do the whole table top with the sander. Once the stripping was done, I sanded again with a finer grit. After that, I cleaned the top of all the dust with a wet cloth. There was a lot of dust so just beware.

The staining ... A few things you'll need. Get gloves and make sure they're the type you can use with stain. The first ones I bought were eaten through by the stain. This will save you from having to clean your hands with mineral spirits. Second, you'll need lots of rags. If you don't have them (like old t-shirts), you can buy them at any hardware store in the paint area. Third, a good brush. I like the Purdy brand at Home Depot and for this I bought a 2.5" brush specifically for oil paint. Don't buy a cheap brush or you'll have bristles falling out all over the place. Finally, mineral spirits for the clean up. We use an old pickle jar with a small amount of mineral spirits to dip the brush in before we wash the brushes with soap and water.
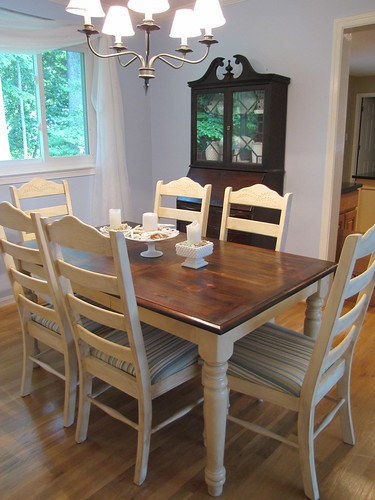
I started with a gel stain and I have to say, I hated it. Applying it was no problem, but wiping it off after application was such a mess! I used so many rags. Then, it took 8 hours to dry. Once it was dry, I decided that the color was light so I decided to do a second coat, but I used traditional stain. That was MUCH easier to wipe off and only took 4 hours to dry. I used a Walnut color.
Finally, polyurethane. I did 1 coat, lightly sanded by hand, wiped the dust and did a second coat. I may do a third coat so that its very smooth.
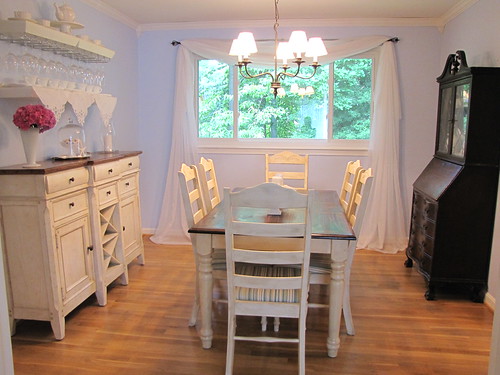
It really wasn't as much work as it sounds. Most of the time I was waiting for things to dry. I did most of the work in the 2 hours my girls were napping each day and maybe another hour in the evening when my husband came home from work. It took about 5 days.
One more thing ... My parents recently refinished their table as well. Their table seemed to be a softer pine. The top had quite a lot of scratches and gouging. If you're refinishing a table that is anywhere close to how thiers was, it is worth considering the additional time it will take to sand out the damage. It might be better to just paint the top instead because sanding all of the scratches out will be tough, but it all depends on how much time you want to spend on it. Their table looks great too!
Wow, you have done a great job here. Thanks for sharing all the detail. Lovely to see furniture being renovated and re-used - and so much cheaper than buying something ready distressed. I am sure you will enjoy many happy meals around your new table!
ReplyDeleteSo much better! Also, wanted to let you know I gave you an award on my blog!
ReplyDeleteIt's beautiful! Great work!
ReplyDeleteWOW! The table is perfect!!!
ReplyDeleteIt is absolutely gorgeous. So worth the effort.
ReplyDeleteGreat tutorial, and I think your table turned out just gorgeous. Your dining room is stunning. Refinishing the top of my breakfast table is on my to do list. Thanks for sharing yours. Hugs, Marty
ReplyDeleteThe table and chairs look fantastic!
ReplyDeleteyour table and chairs look amazing, I especially like the dark stain on the table top
ReplyDeleteWell, it's certainly beautiful, I'll say that! I don't venture into painting and staining. Just don't have the knack for it. But I sure admire those who do! You've a gorgeous set of furniture there!
ReplyDeleteBrenda
It really doesn't matter how many times I've seen something with a fresh coat of paint, I'm still surprised at what a difference it makes. Your table looks just fabulous! I redid a similar set but didn't do the top dark.....oh how I wish I had! I like it so much better.
ReplyDeleteBlessings,
Spencer
Great job. The table and chairs are beautiful
ReplyDeleteI love the table. I have been doing google searches for a while to find "just" what I am looking for before I jump in and do my own table refinishing. I love this! What kind of spray paint did you use and what is the stain rub you mention? Thanks!
ReplyDeleteAh mate thanks a lot. I’ve been looking for a lot of jQuery tutorials regarding charts and i stumbled upon this.Just wanted to say thank you for the help.
ReplyDelete